The leaf tapestry that began in March is still on my loom--will it ever end?? Not at the pace I'm currently working on it. I haven't finished a large piece this year and that's beginning to get to me.
Here's the state of the leaf tapestry right now. This is the third of five leaves completed.
I am continuing with my tapestry diary work each day... so I will at least have one tapestry done in 2018, unless something drastic happens, I guess! Here's the September stick... I found a stone yesterday that I'll be using for October.
But... it takes time and when I don't give the time to the weaving, doesn't get done. There are no elves that come into my studio at night or on days that I'm out of town to do the work for me. Can't blame anyone other than myself for lack of tapestry production.
Oh well. In the meantime, I've given myself a gift of a couple of days of private workshop/tutorial with Sandy Webster. Sandy is well known for her expertise in preparing and using earth pigments in different ways. In fact, she's written a book about the subject--one I've had for a few years and have used as a guide for my earlier earth pigment painting experiments I've written about before.
 |
| These are just a few of the earth pigments that Sandy has collected over many years. |
Those paintings I'd made were OK; I'd written about those before in the blog at these posts. But I wasn't yet satisfied with the quality of the pigment--it was still too gritty, in my opinion, for what I wanted to achieve. I wanted to have a chance to work with Sandy to learn more about the process, figure out what I could do to improve the pigment for a smoother effect with the paints.
I've just gotten back from a two day time with her and found that my questions about what to do to refine my pigment even more were answered in the first hour! The secret to what I needed--and didn't yet have--was an even finer mesh screen to sift the pigment.
 |
| Sandy is sifting with a 35 mesh screen first. |
Here's one of the darker red colors I brought that's been sifted through the 100 mesh screen:
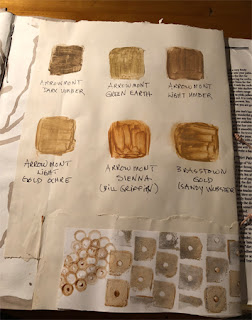
We went through the process of mulling the processed pigment using water and a glass muller. To turn it into watercolor, gum arabic and a little honey were added. The pigment and the additions were mulled again and when smooth and well blended, it was scraped up with a spatula and put into a container--small plastic pill containers were what she'd recommended for that.
 |
| Here are my watercolors made with earth pigments at Sandy's studio. |
Even though my interest was at first in learning more about how to prepare the earth pigments, I got to see several of her handmade books and two of them particularly interested me--one was a simple small book made with a slot and tab method linking page after page.
 |
| Here's a pattern--although the slot and tab areas are too big in this. Sandy's book is behind, at the edge of the cutting board. |
Sandy showed me how to make the little book and I used strips from a few previous earth pigment paintings I'd made when at Lillian Smith Center a couple of years ago. This is such a SIMPLE process but it took me a few minutes to get the hang of it. I can see how making this could become addictive! It's caused me to think of all those page after page of not quite right watercolors that I have stored for years. Fodder for these books, for sure! I made my version of the small book after our day's session ended. I stayed at the apartment Sandy has near her house and had time to do this in the evening, as well as look at her sample book and prepare pages for the next book I'd be doing the next day.
And the other was a field sketchbook with a box built into the side to hold tools and a spine holding papers, stitched in such a way that she could remove filled sheets and add more. Even though, as I said, my primary reason for being with her for a tutorial was to work with earth pigments, when I saw the books, I immediately wanted to do both!
Next, Sandy walked me through a step-by-step demo of constructing the field sketchbook by doing one--and I added the pages I prepared the night before, one's I'd previously dyed with black walnut and also some I'd painted with earth pigments a couple of years ago.
Sandy's showing me how to measure the items the box should hold to determine the size of the book's cover. The things to be carried along as well as the size of the pages gives the size needed.
 | ||
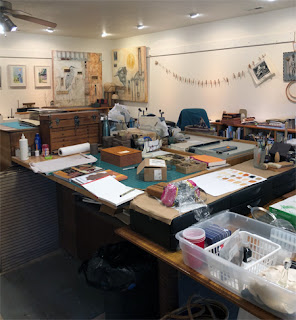
| Overview of Sandy's studio. |


No comments:
Post a Comment