In a way, almost everything about tapestry is tedious. But to look at it another way maybe it's meditative. Whatever I call it--it's surely slow!
Briefly, here are a few steps in the making of a tapestry:
1. Decide upon a design concept/idea/image (this may take hours, days or perhaps weeks or longer)
2. Actually put design into reality (make a photo, drawing, painting, sketch, or otherwise have an image firmly in one's head; possibly make a cartoon to attach to the warp)
3. Prepare the loom for weaving (put the warp on the loom; prepare it for weaving with spreading or foundation and weave header. Secure ends, maybe with half-hitches)
4. Select wefts (order more if the stock is slim)
5. Attach the cartoon to the warp
and
6. Begin weaving.
7. Continue weaving.
8. Weave some more.
9. Keep going with the weaving even when it seems it will never end.
10. Get excited because the end of the weaving is near!
11. FINISH the weaving!!
12. Secure the ends so some of the precious WEAVING won't unravel.
13. Cut off the tapestry! Yay!
14. Begin to finish the tapestry (clip weft ends; clip warp ends; possibly steam press the tapestry)
15. Deal with the ends by turning back the hems (if they were included in the weaving) or in some other way accommodate the warp finishing (braids, half-Damascus, etc.)
15. Complete the finishing of the tapestry by attaching velcro to strips and sewing those to the tapestry; attaching the opposite side of velcro to a hanging bar; or stitching the tapestry to a fabric covered mounting frame that also has to be prepared.
16. Hang the tapestry, maybe in an exhibit or maybe in your home (or both) and say, "Job well done!" and then begin all over again with a new design idea....
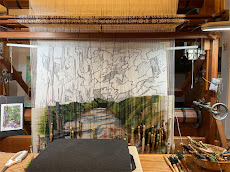
Here are a few of the finishing process photos from the past couple of days with the latest tapestry.
 |
| Tapestry is laid out to have weft ends trimmed. |
 |
| I comb the wefts and then trim to about 1" long. |
| Bobbins are being emptied; I store the remaining wefts in plastic bags. |
 |
| Getting ready to give the tapestry a steam pressing--for that, it's placed on layers of sheets on the kitchen counter, given a good spraying of water, then covered with press cloth for the ironing. |
 |
| I dampen the press cloth and use a wool setting on the steam iron. The wefts are all wools so I don't worry about shrinkage being different. If I used a mixture of weft types I might eliminate this step. |


A beautiful weaving, I like the idea of combing the weft ends, I never really know how to treat these.
ReplyDeleteWell, tedious maybe but people always comment to me how much patience I must have and I have decided that it is passion, not patience!
ReplyDeleteI enjoyed seeing the finishing photos Tommye as I really have finishing on my mind these days.
You forget the step of periodically un-weaving what you wove, either to correct mistakes or to change design elements in process (like a different weft yarn or shape). Or is that just my problem?
ReplyDeleteHo ho, Antony! Yes, that step is definitely one!! Thanks for noting it.
Delete